
canvas 是 HTML5 新增的标签,利用它我们可以轻松实现图形的绘制。canvas 元素本身并没有绘制能力,它只是一个图形的容器,必须使用脚本(通常是 JavaScript)配合来完成绘图任务。今天为大家分享一下基于 canvas 动态气泡背景的实现方法。

实现方式
将下面的内容保存为 .js 文件,然后在网页中引入即可。
document.writeln("<div id=\'bubble\' style=\'width:100%;height:100%;position:fixed;top:0;left:0;z-index:-1;\'></div>");
class BGBubble {
constructor(opts) {
this.defaultOpts = {
id: '', // 容器ID
num: 100, // 个数
start_probability: 0.1, // 如果数量小于num,有这些几率添加一个新的
radius_min: 1, // 初始半径最小值
radius_max: 2, // 初始半径最大值
radius_add_min: .3, // 半径增加最小值
radius_add_max: .5, // 半径增加最大值
opacity_min: 0.3, // 初始透明度最小值
opacity_max: 0.5, // 初始透明度最大值
opacity_prev_min: .003, // 透明度递减值最小值
opacity_prev_max: .005, // 透明度递减值最大值
light_min: 40, // 颜色亮度最小值
light_max: 70, // 颜色亮度最大值
is_same_color: false, // 泡泡颜色是否相同
background: "#f1f3f4"
}
if (Object.prototype.toString.call(opts) == "[object Object]") {
this.userOpts = {...this.defaultOpts, ...opts}
} else {
this.userOpts = {...this.defaultOpts, id: opts}
}
this.color = this.random(0, 360)
this.bubbleNum = []
this.requestAnimationFrame = window.requestAnimationFrame || window.mozRequestAnimationFrame || window.webkitRequestAnimationFrame || window.msRequestAnimationFrame
this.cancelAnimationFrame = window.cancelAnimationFrame || window.mozCancelAnimationFrame
}
random(a, b) {
return Math.random() * (b - a) + a //取a-b之间的随机值
}
initBubble(color, isSameColor) {
const width = window.innerWidth
const height = window.innerHeight
const userOpts = this.userOpts
const light = this.random(userOpts.light_min, userOpts.light_max)
this.bubble = {
x: this.random(0, width),
y: this.random(0, height),
radius: this.random(userOpts.radius_min, userOpts.radius_max),
radiusChange: this.random(userOpts.radius_add_min, userOpts.radius_add_max),
opacity: this.random(userOpts.opacity_min, userOpts.opacity_max),
opacityChange: this.random(userOpts.opacity_prev_min, userOpts.opacity_prev_max),
light,
color: `hsl(${isSameColor ? color : this.random(0, 360)},100%,${light}%)`,
}
}
bubbling(ctx, color, isSameColor) {
!this.bubble && this.initBubble(color, isSameColor)
const bubble = this.bubble
ctx.fillStyle = bubble.color;
ctx.globalAlpha = bubble.opacity;
ctx.beginPath();
ctx.arc(bubble.x, bubble.y, bubble.radius, 0, 2 * Math.PI, true);
ctx.closePath();
ctx.fill();
ctx.globalAlpha = 1;
bubble.opacity -= bubble.opacityChange;
bubble.radius += bubble.radiusChange;
if (bubble.opacity <= 0) {
this.initBubble(color, isSameColor)
return
}
}
createCanvas() {
this.canvas = document.createElement('canvas')
this.ctx = this.canvas.getContext('2d')
this.canvas.id = "bg_canvas";
this.canvas.style.display = 'block' //防止全屏的canvas出现滚动条
this.canvas.width = window.innerWidth
this.canvas.height = window.innerHeight
this.canvas.style.position = 'fixed'
this.canvas.style.top = '0'
this.canvas.style.left = '0'
this.canvas.style.zIndex = '-1'
document.getElementById(this.userOpts.id).appendChild(this.canvas)
window.onresize = () => {
this.canvas.width = window.innerWidth
this.canvas.height = window.innerHeight
}
}
start() {
const width = window.innerWidth
const height = window.innerHeight
this.color += 0.1
this.ctx.fillStyle = this.defaultOpts.background; //这里修改颜色hsl(${this.color},100%,97%)//rgba(255, 255, 255, 0)
this.ctx.fillRect(0, 0, width, height);
if (this.bubbleNum.length < this.userOpts.num && Math.random() < this.userOpts.start_probability) {
this.bubbleNum.push(new BGBubble())
}
this.bubbleNum.forEach(bubble => bubble.bubbling(this.ctx, this.color, this.userOpts.is_same_color))
const requestAnimationFrame = this.requestAnimationFrame
this.myReq = requestAnimationFrame(() => this.start())
}
destory() {
const cancelAnimationFrame = this.cancelAnimationFrame
cancelAnimationFrame(this.myReq)
window.onresize = null
}
}
const bubbleDemo = new BGBubble('bubble')
bubbleDemo.createCanvas()
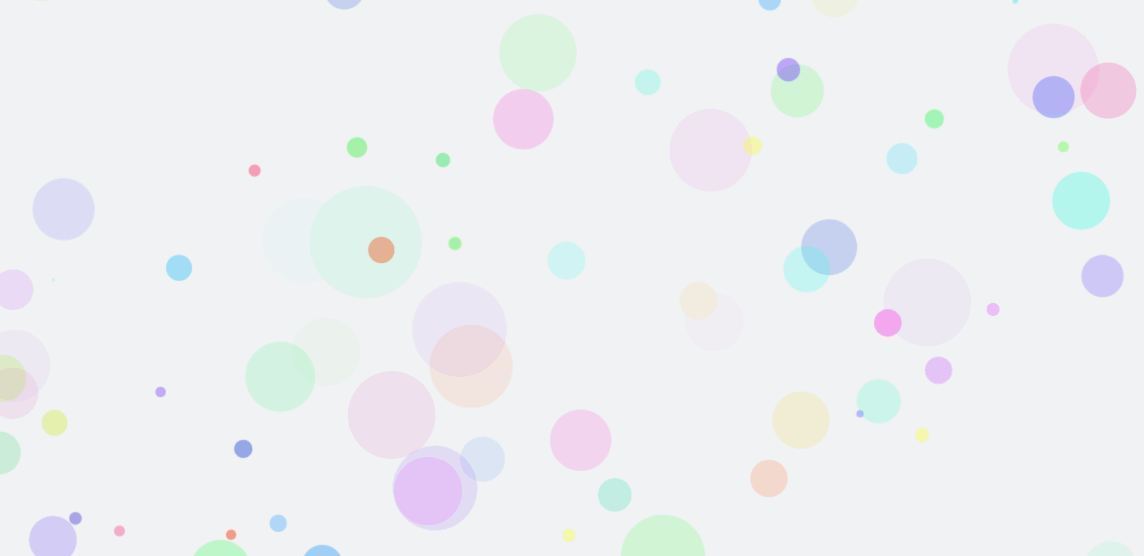
bubbleDemo.start()效果预览
参数可以自行修改,完成后的预览效果如下:
结束语
利用 canvas 通过脚本我们可以绘制出各式各样的图形,本文简单分享了一下一款基于 canvas 标签非常酷炫的动态气泡背景的实现方法,如果大家喜欢的话可以添加到自己的网站上。如果有任何问题或建议,欢迎在下方评论处留言。
本文已通过「原本」原创作品认证,转载请注明文章出处及链接。
